Saturday, April 16, 2022

Playing with M5Stack

M5Stack 

If you are an ESP32 WiFi MCU fan, chances are you already know the M5Stack kits. M5Stack is a very cool platform that consist of a handful of different ESP32 based controller boards, and a whole lot of sensors ready to plug to your controller of choice. All the devices are nicely packaged and ready to use in Arduino IDE or UiFlow: a web based IDE supporting Blocky and micro Python languages.

What's this?

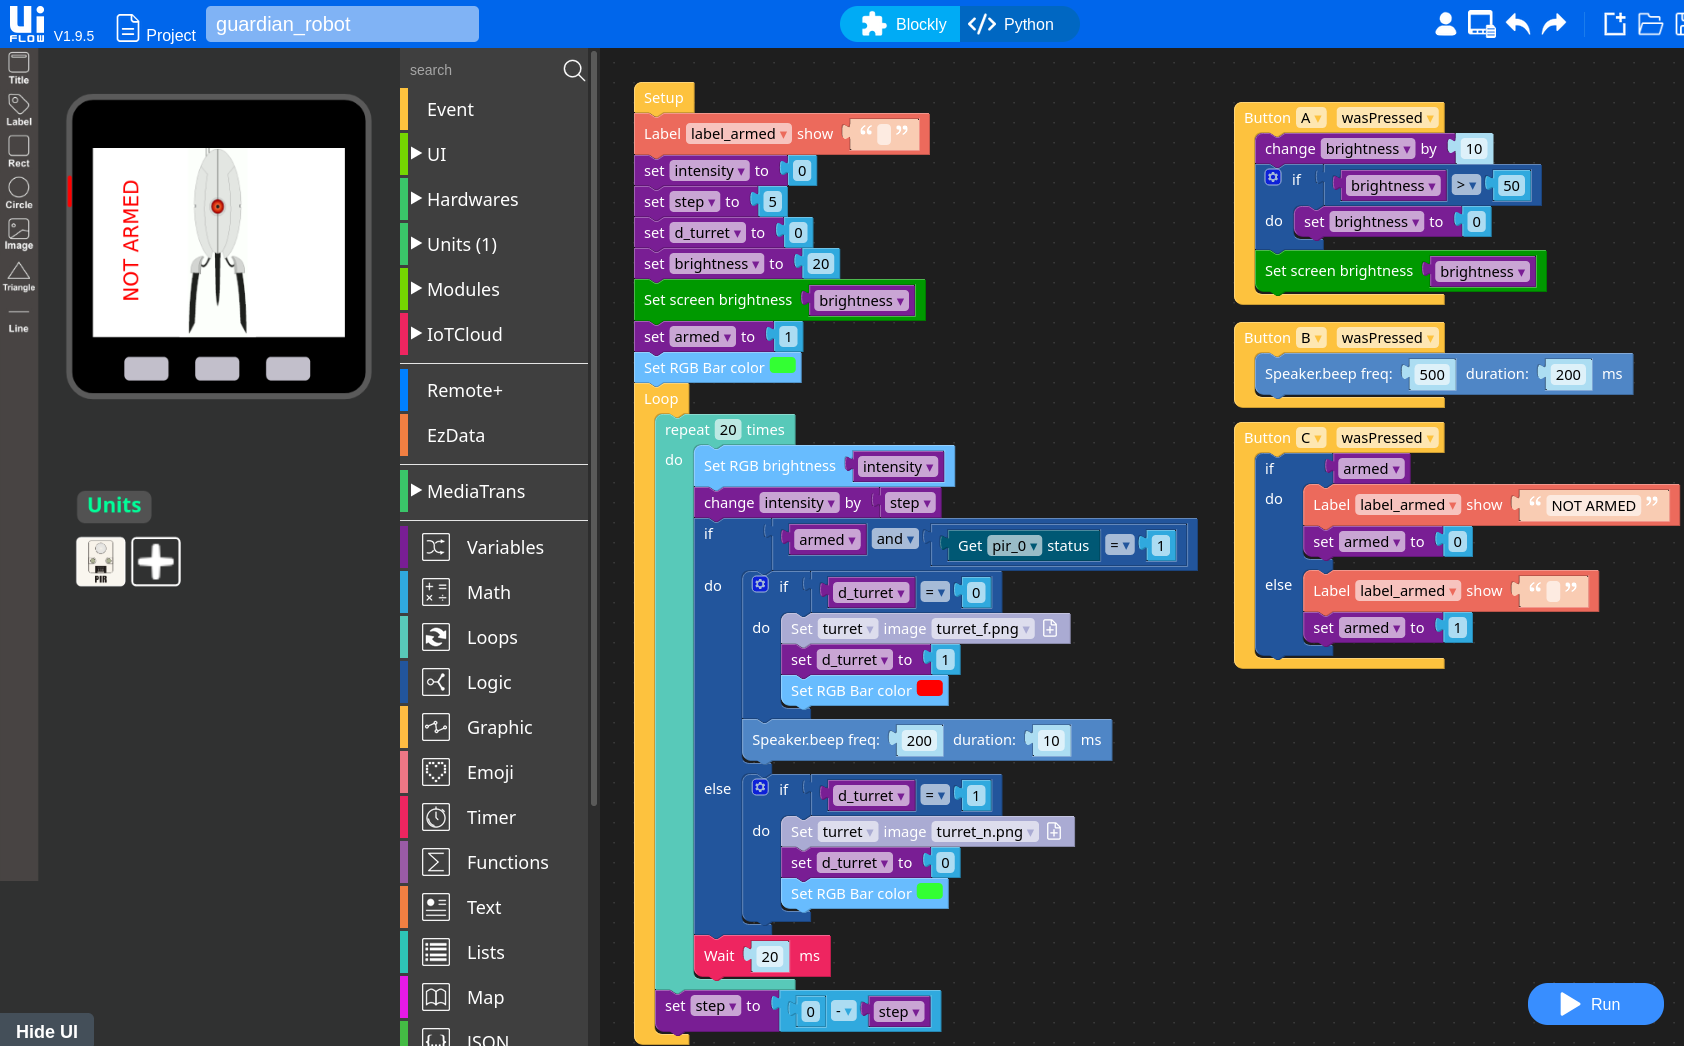
UiFlow is really cool, you just connect sensors to your core module and power it on. It then connects to the cloud, so you can open the UiFlow IDE on your browser and connect to your module. Then you grab some blocks, plug them to build your application, hit RUN button and the program is instantly downloaded and run on your core. It even allows switching your program from Blocky to Python with one click, how cool this is for teaching programming and robotics to kids?

Hello, is anybody there?

So, if you want to attach a PIR sensor to the M5Stack FIRE core to build a sentry turret with your son (as I did and you can see in the photos above), that's great. But what if you want a more "standard" development environment C/C++ based? Well, you can use Arduino. But what if like me, you are not an Arduino fan and want to use a pure Espressif IoT Development Framework (aka esp-idf)? This is where the fun starts.

esp-idf

You might be wondering why bothering with esp-idf instead of using UiFlow/Arduino. I find UiFlow awesome for learning purposes. But being micro Python running on an ESP32 under the hood, I find performance not that great, and the language a bit limited when you want to do complex tasks and there is not an already made module doing it for you.

With Arduino, for me the problem is similar. You can use Arduino to do complex programs. But usually Arduino shines when you do not want/need to care about the underlying hardware: registers, interrupts, DMA, etc. When you need to do a very specific use of the hardware, the way Arduino tries to hide the complex details will get in the way and make things more difficult. Also I have found several times Arduino modules with a not that good code quality.

But what about esp-idf? For me it's the real deal for ESP32 development: it's an evolution of ESP8266_RTOS_SDK (for their older ESP8266 chips). esp-idf is just the compiler, a Python build script (using CMake under the hood) and a whole lot of ready to use libraries, all of them Open Source (excepting the ESP32 WiFi/BT binary blobs). It includes the good-old FreeRTOS for task management, lwIP as network stack, a bunch of ready to use protocols (MQTT, HTTPS client and server, SMPT, MDNS, etc.), peripheral libraries for all the usual suspects (GPIO, ADC, DAC, neopixel LEDs, SPI, I2C, UART, etc.) and a lot more. The build system and all these components are very well documented, and most of the libraries have ready to build and test examples!

For me this is the ideal way of making an SDK for embedded development: use standard tools (like CMake and menuconfig) and take care of integrating as many useful open source libraries as you can. Then let the user choose how to integrate this into their favorite editor/IDE!

I will not cover how to install and use esp-idf. The official documentation has a nice installation guide, or alternatively if you are a Docker user, you can try my ready to go image. Just make sure you are using the v4.4 branch:

$ docker run --rm --device=/dev/ttyUSB0 -v $HOME/projects:/home/esp/projects \
        -it registry.gitlab.com/doragasu/esp-dockerfiles/esp-idf:v4.4

Adjust the paths above as needed by your environment, and put these lines in a script if you are going to use this image regularly!

It's all about peripherals

Using esp-idf for ESP32 development is great, but there is a catch: esp-idf will support out of the box some of the peripherals included in your core. But not all, specially it does not support the screen and sensors external to the ESP32. So you want to acquire some accelerometer readings and print them on a nice graph? Then you have to work a bit more. Or at least you had until I decided to step in ^_^. I have gathered in one place all you need to add to esp-idf to support all the peripherals included in the M5Stack FIRE kits. Also included is an example application showing how to use it all. You can find this in the idf-M5Stack GitLab repository.

If you already have esp-idf installed, this is all you need. Plug your M5Stack controller and build and flash the example application:

$ git clone --recurse-submodules https://gitlab.com/doragasu/idf-m5stack.git
$ cd idf-m5stack
$ idf.py flash monitor

That's all, if everything works, when the app boots, it will beep twice and then you should see on the screen a 3-line graph plotting the gyroscope readings, three bars showing the magnetometer state and a spinner with a number inside representing the current battery capacity. Pressing A button will change the screen brightness. If your module has the dual LED bar, it will show a multicolor LED chase effect. Isn't it nice for a 350 LoC pure C application?

Move me!

If you got compile errors, make sure you are using the 4.4 branch of esp-idf, it is the one I used to build the repository. Below I will enumerate the supported peripherals and detail their support status. Read the repository README.md file for more details!

Screen

The 320x240 IPS screen is supported via the Light and Versatile Graphics Library (LVGL). This library is extremely nice and will make you wish you had a touch interface if, like me, you have a core without one. You can create all kind of widgets with just a few lines of code, it supports themes, custom styles, several fonts... really neat piece of software.

The screen backlight is not managed by the LVGL library itself, but is also supported through the LVGL ESP driver.

Flash

The 16 MiB flash is directly supported by IDF, just needs to be properly configured in menuconfig. The framework takes care of this, so you should have no problem.

PSRAM

The 4 MiB SPI PSRAM is directly supported by IDF. Again it just needs to be enabled in menuconfig, and the framework will do it for you.

Pushbuttons

Pushbuttons A, B and C are directly connected to GPIO pins 39, 38 and 37. Thus they are directly supported using the IDF GPIO functions. You can use standard esp-idf APIs to control them via polling or interrupt.

Dual LED bar

The cool dual LED bar present in M5Stack FIRE kits is directly supported by IDF using the RMT driver and the component included with the led strip example. You can see the example code to learn how it works.

6-axis IMU MPU6886

The IMU is supported using a tiny driver I wrote (initially for the M5Atom Matrix core). It is a bit bare-bones, but for simple use cases it just works.

Magnetometer BMM150

This 3-axis digital geomagnetic sensor is supported using the Bosch Sensortec BMM150 Sensor API. It uses the upstream code directly from the manufacturer, with a bit of glue logic provided by esp_bmm150 repository.

Speaker

The speaker is direclty driven by the DAC using the GPIO 25 pin. The example program uses the esp-idf cosine wave generator API to beep it twice.

Microphone

The microphone is connected to the ADC using GPIO 34. You can browse the esp-idf ADC examples to learn about how to use it.

Battery readings

M5Stack Core modules manufactured after march 2018 manage battery charging using an IP5306 variant connected to the I2C bus. Unfortunately there is no complete documentation of this chip as of today (only a partial datasheet in Chinese, for more information read here). If your board supports this charge IC, the demo application shows the battery level (in 25% steps: 25, 50, 75 or 100) in the center of the spinner widget. If the chip is not found/supported, a '?' character will be shown instead.

microSD card

Unfortunately, things here get a bit messy. The screen and the microSD card share the same SPI bus. This, along with the way the LVGL ESP32 driver works, causes a conflict with SPI bus initialization. Don't worry, this can be solved, but it requires a tiny modification in the LVGL driver code, and has a small performance hit. The fix is explained in the README.md file, so read it if you need the microSD card support. But for applications that do not need it, it is better not enabling the support, to avoid the performance hit on the screen interface. The microSD card code is not included in the master branch, but if you need it, you can checkout the sdcard branch in the repository to have a look.

And that's all, using this framework you should be able to build applications supporting every bit of hardware available on the M5Stack FIRE boards! If you want to plug them some more modules, you will have add support yourself though. Some modules like the PIR are trivial to support (since you just have to read a GPIO pin), but others can be more challenging. Anyway, where is the fun if everything is already done?

 Happy hacking!

Friday, August 27, 2021

Evaluating Rust for embedded firmware development

You might be wondering how Rust fits in the embedded firmware development world. So was I, so I decided to give it a try. My intention was to build a simple ecosystem to test with a STM32F401 MCU, similar to the one I made here in plain C, using libopencm3.

So the requirements for this environment are:

  1. A comfortable and easy to use build and deploy (flash) environment.
  2. A Hardware Abstraction Layer (HAL) supporting the most common ARM Cortex-M MCUs.
  3. An operating system allowing some basic multitasking.
  4. Some debugging facilities: traces and a gdb stub.

 Did I complete the environment fulfilling all these requirements? Let's see.

Scope

This post will try to briefly cover the environment setup and the support for embedded MCUs. It will not deal with the Rust language itself and how it compares to C. You can have a look for example here if you are interested. It also does not pretend to be a detailed guide, just a brief explanation to give an insight into the process, so you know what to expect. If you want more detailed info, a good place to start is The Embedded Rust Book.

Build environment

The toolchain is dead easy to setup: install rustup from your favorite distro package manager, and use it to automatically install (and keep updated) your toolchain of choice. For example for the STM32F401 (that is an ARM Cortex-M4 MCU), you need to install the thumbv7em-none-eabihf toolchain:
$ rustup add thumbv7em-none-eabihf
And that's all!
 
My original C build environment was Makefile based. After setting up the toolchain as explained earlier, for embedded Rust you will already have installed Cargo. It works just the same as with standard Rust development. And man, Cargo is just awesome. You have a single place to build your project, manage dependencies, install additional dev tools, flash the MCU, start the debugger... At this point, it is recommended to install the following additional Cargo tools to ease development:
  • cargo-binutils: you can use binutils directly from your ARM cross compiler, but installing this eases the process. For example, once installed, you can see your release binary size with an invocation of cargo size --release. Note that for latest versions to work, you will also have to rustup component add llvm-tools-preview.
  • cargo-flash: allows easily flashing the firmware to the target MCU. Uses probe-rs under the hood.
  • cargo-embed: allows using RTT (Real Time Transfer, more on this later) and starting the GDB server stub. Also uses probe-rs under the hood.
  • cargo-generate: for quick and easy creation of project templates (you can see it as a supercharged version of cargo init).

All these tools can be installed with two commands:

$ cargo install cargo-binutils cargo-flash cargo-embed cargo-generate
$ rustup component add llvm-tools-preview

To conclude this point, we have to give a big point here to Rust: Cargo is extremely more powerful than my simple Makefile. It is also easy to use and does not get in the way as I feel modern and bloated IDEs do. Configuring Cargo is easy (using Cargo.toml and .cargo/config files), and if you need a complex build (for example generating bindings from Protobuffer files), you can create build.rs scripts and they are supported exactly the same as always.

Hardware Abstraction Layer

For my C projects, I was using libopencm3 to abstract the hardware. This library is really great: small, very easy to use, supports a lot of devices and has a ton of examples available. It has just one thing that can be seen as a defect (and that for some projects can be a very big one): it is LGPLv3 licensed. And as dynamic linking is not a possibility in the MCU world, if you use this library, you must either release your sources under a compatible license or release the object files of your project along with a script allowing to link them. This can be problematic for the commercial world, but not only there: it can cause problems mixing the lib with other incompatible licensed ones. Please do not use LGPL with libraries intended to be used in embedded devices. Or at least not without a linking exception.

The HAL layer in Rust is separated in several crates. There is a cortex-m crate abstracting the CPU and standard ARM peripherals (like the ARM SYSTICK system timer and the NVIC interrupt controller), and there are also a lot of HAL crates abstracting all the other MCU peripherals, separated in families. For example, for my STM32F401, I have to use the stm32f4xx-hal crate along with the aforementioned cortex-m crate. I have yet to thoroughly evaluate these crates, but code quality looks great. It uses the builder pattern for peripherals to make configuration of devices easy, and it uses idiomatic Rust features to implement zero cost abstractions that prevent some programming errors without incurring in CPU usage penalty (checks are done at compile-time). For example to configure a GPIO as an input with internal pull-up, this information (input, internal pull-up) is embedded in the GPIO pin type, so if you try using the pin as an output, you will get a compiler error.

And here I must declare another win for Rust. libopencm3 is great, but its LGPLv3 license can be troublesome, while cortex-m is MIT/Apache licensed and usually the stm32fxxx-hal crates are 0BSD licensed. Also although libopencm3 is very high quality, the Rust HAL crates use the additional Rust features C lacks to make your life easier (once you learn enough Rust to fix the build errors 😅). Some people can argue that I could directly use CMSIS instead of libopencm3, but it's a lot lower level. Or that I could use the HAL provided by ST Microelectronics, but it's closed source and code quality does not seem as good. So point for Rust.
 

Multitasking

For simple embedded projects, I just use interrupt-based multitasking: you have your main loop doing low priority stuff in the background (or sometimes not even that, a plain empty loop idling or entering a low power mode) and that loop is preempted to process external events using hardware interrupts (a timer fires, or you receive audio samples to process via DMA interrupt, or you receive a command via any communication interface, someone pushes a button, etc.).
 
For more complex projects, I like using an OS that gives you thread implementation and synchronization primitives (semaphores, locks, queues, etc) to allow separating the components in different and almost independent modules that can be easily plugged/unplugged/modified without affecting the rest of the system. In the past I used RTX51-TINY and TI-RTOS (previously known as SYS/BIOS or DSP/BIOS). Nowadays I tend to use FreeRTOS (I have yet to test ChibiOS and Contiki, but FreeRTOS is good enough for me).

Browsing crates.io, it seems there is no widely accepted classic multithreading OS implementation for embedded Rust. I found two shim layers that wrap FreeRTOS under a Rust interface, but they do not seem widely used and they look almost abandonded (the latest release was more than a year ago). So I decided to test what nowadays seems to be the most widely accepted solution to implement concurrency in embedded Rust: RTIC (Real-Time Interrupt-driven Concurrency).

RTIC is elegant and minimalistic. It also looks great for hard real-time applications: the simple dispatcher implements the Immediate Ceiling Priority Protocol (ICPP) to schedule tasks with different priorities in a deterministic manner. This allows doing analysis like Worst-Case Execution Time (WCET), mandatory in critical systems. Unfortunately RTIC does not implement classical multithreading: RTIC tasks respond to external events (a button press, new data received, a timer wrap) and must return when their processing is complete (i.e. no infinite loops like in many typical threading approaches). This can be enough for many systems, but in my opinion makes more difficult to separate different components in non-critical systems. In fact, if we compare using RTIC with just using a background task with interrupt handlers in Rust, RTIC almost only improves the sharing of data between different interrupts and the background task. Other than that the approach is almost the same!

Another possibility to achieve concurrency in embedded Rust I have not explored, is going the async/await route. It seems recent additions to the compiler allow asynchronous programming in embedded Rust. But I have to admit I am not the best fan (yet) of async/await semantics, so I decided not to explore this route (yet).

Reaching a conclusion in this subsection is not easy, but I think I will give the point to classic C + FreeRTOS. The FreeRTOS and ChibiOS layers in Rust seem barely used and developed and the RTIC implementation does not cover all my needs. But this might change in the near future: maybe the async/await route is the way to go. Or maybe the FreeRTOS support will improve.

Debugging

Having a comfortable debugging environment is very important for embedded systems. I do most of my debugging using simple traces, but I like using gdb when things get ugly and those bugs that make you scratch your head appear.

Debug trace

My trace implementation approach for the C environment is pretty straightforward: use an UART to log the data. To avoid the logs interfering with the program flow as much as possible, I use DMA to get the data out of the chip. I have also defined some fancy macros to implement logging levels (with color support) that directly do not compile the logging code if the log level (defined as a constant at compile time) is below the threshold. This is very useful because it allows flooding the logs of the verbose and debug levels for debug builds, but easily removing all these logs for release builds just by changing a build flag (this way the log code does not even get compiled into the final binary).

I could have used a similar approach for the debug trace in Rust, but I wanted to try a more modern approach that avoids using additional hardware (the UART). So I tried two approaches: gdb semihosting and RTT.

To log using gdb semihosting, you just use the hprintln!() macro included in the cortex-m-semihosting crate. You must enable gdb semihosting in the gdb debugging session, but this is typically taken care transparently by using a gdb init script. Using this approach is easy, it works and is compatible with gdb debug sessions (in fact it needs a gdb debug session to work!). But unfortunately it has some unconvenients: using hprintln!() macro crashes your program if the debugging probe is not connected! Initially I thought this was caused because I was unwrapping hprintln!() calls (e.g. hprintln!("Hello World").unwrap();), so I thought hprintln!() was returning error and the unwrap() was causing the program to panic. But replacing whe unwrap() calls with ok() did not fix the problem, so it seems that hprintln()! just hangs the program if the debug probe is not connected. Another problem with hprintln!() is that it is very slow. When one of this calls is invoked, the CPU is stopped, the debug probe has to realize there is data to transfer, transfer the data and resume the CPU. This can take several milliseconds!

To log using RTT (Real-Time Transfers) you need the cargo-embed crate installed on the host, you have to initialize RTT by calling rtt_init_print!() and you have to use the rprintln!() or writeln!() macros to log. RTT is very fast and it allows defining several channels that can be input/output and blocking/nonblocking. So you are not restricted to a single slow output blocking channel like when using semihosting. This is much better than hprintln!(), but unfortunately it seems using RTT and at the same time GDB is troublesome. Support for using both at the same time was added a month ago (version 0.11.0) and in my experience does not work very well: when I enabled both at the same time, the output interleaving GDB and RTT outputs gets borked. I hope this gets improved in the future (or maybe I have not been able to properly configure it?). Another problem with RTT is that sleep modes break the RTT connection (at least for the STM32F401). This is specially annoying when using RTIC, because the default idle task puts the MCU in sleep mode. So I had to override the idle task to prevent the MCU entering sleep in order for RTT to work.

GDB stub

I was able to set-up and use the GDB stub with both log configurations (semihosting and RTT). If you are using semihosting, the usual way to start a debug session is first starting openocd in a separate terminal, then either manually running cross gdb, or configuring .cargo/config file to be able to start it automatically via cargo run. When using RTT, you start the gdb server stub by invoking cargo embed (instead of running openocd), and then you directly run cross gdb or cargo run as before. The only thing to highlight here is that as I wrote above, using RTT and GDB at once breaks RTT output.

Debugging the blinker with cross gdb under cgdb

So the point here goes to... no one (or to both, it's a tie). I had no problem to set-up GDB, and although I had some trouble with log traces, nothing prevents me using an UART to send the trace data like I did in my plain C project template. By the way, I have not bothered but I should also be able to use RTT with my plain C project template, so as I wrote, it's a tie here.
 

Wrapping up

So far, it seems Rust is a very good alternative to C for embedded firmware development on the supported MCUs (shame there is no WiFi support for the esp32 platform). The build environment is just awesome, support for ARM Cortex-M devices looks very complete and you should be able to debug the same you do with your C projects. It might lack a bit when talking about concurrency with multithreading, but for not very complex programs RTIC should be enough and I am sure threading support will eventually catch up. If you feel adventurous, you can also try the asynchronous approach using async/await. Please let me know in the comments if you do.
 
Happy hacking!

Friday, March 12, 2021

Configuring YouCompleteMe for embedded software development

If you are a heavy vim user, you know no other editor (excepting derivatives like neovim) can beat the code editing speed you get once you develop the required muscle memory. But the standard vim install lacks the fancy development features available at most heavyweight IDEs: fuzzy code completion, refactoring, instant error highlighting, etc. Here is where YouCompleteMe (YCM) comes to rescue, adding all these features to vim, while preserving everything you like from everyone's favorite text editor.

There are a lot of guides on the net detailing how to install, configure and use YCM, including the official ones, so I will refrain from repeating them. But after a bit of searching, I could not find a tutorial explaining how to configure YCM for embedded software development in C/C++ language. It is not very difficult, but there are some tricky steps that can be hard to guess, so I decided to write down a small guide here.

In this entry I will explain how to create a .ycm_extra_conf.py file and tune it to develop for a specific hardware platform. As an example I will show the modifications required to develop for Espressif ESP32 microcontrollers using their official SDK esp-idf.

Prerequisites

To follow this tutorial you will need the following:

  • A working vim + YouCompleteMe setup.
  • A working cross compiler install + SDK for the architecture of your choice. In this blog entry I will be using esp-idf v4.2 for Espressif ESP32 microcontrollers. This includes a cross GCC setup for the Tensilica Xtensa CPU architecture.

The base system used in this guide is a Linux machine. I suppose you can follow this guide for macos and Windows machines just by changing the paths, but I have not tested it.

Procedure

Configuring an embedded development project for YCM to work properly requires the following steps:

  • Creating the base .ycm_extra_conf.py configuration file.
  • Configuring the toolchain and SDK paths.
  • Obtaining the target compilation flags and adding them to the config file.
  • Removing unneeded and conflicting entries from the compilation flags.
  • Adding missing header paths and compile flags.

The configuration file

The usual way you configure YCM, is by having a .ycm_extra_conf.py file sitting in the root directory of every one of your C/C++ projects. Creating these files for non-cross platform development is usually easy and you can configure vim to use a default config file for all your projects (so you do not have to copy the .ycm_extra_conf.py to every project). If your build system uses make, cmake, qmake or autotools, you have a chance to generate the file automatically using tools like YCM-Generator. But in my experience, for cross platform development environments using complex build systems (like OpenWRT, ninja, complex makefiles, etc.), you end up having to manually customize the configuration file yourself. And that's exactly what I will do in this guide, so let's get to work!

The base config

The first step is to grab somewhere a .ycm_extra_conf.py example configuration file. You can search elsewhere or use this one I trimmed from a bigger one obtained using YCM-Generator on a simple project:

from distutils.sysconfig import get_python_inc
import platform
import os.path as p
import os
import subprocess

DIR_OF_THIS_SCRIPT = p.abspath( p.dirname( __file__ ) )
DIR_OF_THIRD_PARTY = p.join( DIR_OF_THIS_SCRIPT, 'third_party' )
DIR_OF_WATCHDOG_DEPS = p.join( DIR_OF_THIRD_PARTY, 'watchdog_deps' )
SOURCE_EXTENSIONS = [ '.cpp', '.cxx', '.cc', '.c', '.m', '.mm' ]

database = None

# These are the compilation flags that will be used in case there's no
# compilation database set (by default, one is not set).
# CHANGE THIS LIST OF FLAGS. YES, THIS IS THE DROID YOU HAVE BEEN LOOKING FOR.
flags = [
]

# Set this to the absolute path to the folder (NOT the file!) containing the
# compile_commands.json file to use that instead of 'flags'. See here for
# more details: http://clang.llvm.org/docs/JSONCompilationDatabase.html
#
# You can get CMake to generate this file for you by adding:
#   set( CMAKE_EXPORT_COMPILE_COMMANDS 1 )
# to your CMakeLists.txt file.
#
# Most projects will NOT need to set this to anything; you can just change the
# 'flags' list of compilation flags. Notice that YCM itself uses that approach.
compilation_database_folder = ''


def IsHeaderFile( filename ):
  extension = p.splitext( filename )[ 1 ]
  return extension in [ '.h', '.hxx', '.hpp', '.hh' ]


def FindCorrespondingSourceFile( filename ):
  if IsHeaderFile( filename ):
    basename = p.splitext( filename )[ 0 ]
    for extension in SOURCE_EXTENSIONS:
      replacement_file = basename + extension
      if p.exists( replacement_file ):
        return replacement_file
  return filename


def PathToPythonUsedDuringBuild():
  try:
    filepath = p.join( DIR_OF_THIS_SCRIPT, 'PYTHON_USED_DURING_BUILDING' )
    with open( filepath ) as f:
      return f.read().strip()
  except OSError:
    return None


def Settings( **kwargs ):
  # Do NOT import ycm_core at module scope.
  import ycm_core

  global database
  if database is None and p.exists( compilation_database_folder ):
    database = ycm_core.CompilationDatabase( compilation_database_folder )

  language = kwargs[ 'language' ]

  if language == 'cfamily':
    # If the file is a header, try to find the corresponding source file and
    # retrieve its flags from the compilation database if using one. This is
    # necessary since compilation databases don't have entries for header files.
    # In addition, use this source file as the translation unit. This makes it
    # possible to jump from a declaration in the header file to its definition
    # in the corresponding source file.
    filename = FindCorrespondingSourceFile( kwargs[ 'filename' ] )

    if not database:
      return {
        'flags': flags,
        'include_paths_relative_to_dir': DIR_OF_THIS_SCRIPT,
        'override_filename': filename
      }

    compilation_info = database.GetCompilationInfoForFile( filename )
    if not compilation_info.compiler_flags_:
      return {}

    # Bear in mind that compilation_info.compiler_flags_ does NOT return a
    # python list, but a "list-like" StringVec object.
    final_flags = list( compilation_info.compiler_flags_ )

    # NOTE: This is just for YouCompleteMe; it's highly likely that your project
    # does NOT need to remove the stdlib flag. DO NOT USE THIS IN YOUR
    # ycm_extra_conf IF YOU'RE NOT 100% SURE YOU NEED IT.
    try:
      final_flags.remove( '-stdlib=libc++' )
    except ValueError:
      pass

    return {
      'flags': final_flags,
      'include_paths_relative_to_dir': compilation_info.compiler_working_dir_,
      'override_filename': filename
    }

  if language == 'python':
    return {
      'interpreter_path': PathToPythonUsedDuringBuild()
    }

  return {}


def PythonSysPath( **kwargs ):
  sys_path = kwargs[ 'sys_path' ]

  interpreter_path = kwargs[ 'interpreter_path' ]
  major_version = subprocess.check_output( [
    interpreter_path, '-c', 'import sys; print( sys.version_info[ 0 ] )' ]
  ).rstrip().decode( 'utf8' )

  sys_path[ 0:0 ] = [ p.join( DIR_OF_THIS_SCRIPT ),
                      p.join( DIR_OF_THIRD_PARTY, 'bottle' ),
                      p.join( DIR_OF_THIRD_PARTY, 'regex-build' ),
                      p.join( DIR_OF_THIRD_PARTY, 'frozendict' ),
                      p.join( DIR_OF_THIRD_PARTY, 'jedi_deps', 'jedi' ),
                      p.join( DIR_OF_THIRD_PARTY, 'jedi_deps', 'parso' ),
                      p.join( DIR_OF_THIRD_PARTY, 'requests_deps', 'requests' ),
                      p.join( DIR_OF_THIRD_PARTY, 'requests_deps',
                                                  'urllib3',
                                                  'src' ),
                      p.join( DIR_OF_THIRD_PARTY, 'requests_deps',
                                                  'chardet' ),
                      p.join( DIR_OF_THIRD_PARTY, 'requests_deps',
                                                  'certifi' ),
                      p.join( DIR_OF_THIRD_PARTY, 'requests_deps',
                                                  'idna' ),
                      p.join( DIR_OF_WATCHDOG_DEPS, 'watchdog', 'build', 'lib3' ),
                      p.join( DIR_OF_WATCHDOG_DEPS, 'pathtools' ),
                      p.join( DIR_OF_THIRD_PARTY, 'waitress' ) ]

  sys_path.append( p.join( DIR_OF_THIRD_PARTY, 'jedi_deps', 'numpydoc' ) )
  return sys_path

Pointing to headers

The base configuration file has everything necessary for YCM to work. Now we only need to tell it the build flags, including the header locations for the cross compiler and the SDK. So the first customization we do is defining two new variables with the paths to the cross compiler (GCC_PATH) and the toolchain (IDF_PATH). I am writing these in the config file (derived from HOME), but you could get them from environment variables. Note that the config file is a Python script, so you must use Python syntax for the variable definitions.

HOME = os.environ['HOME']
GCC_PATH = HOME + '/.espressif/tools/xtensa-esp32-elf/esp-2020r3-8.4.0/xtensa-esp32-elf'
IDF_PATH = HOME + '/dev/esp-idf'

Make sure these directories point to your compiler and environment locations and jump to the next step.

Getting the compile flags

Now we have to define the compile flags. We have to put them inside the flags array. Usually, the tricky part here is finding the compile flags for your project, especially with most modern build environments that tend to hide the compiler invocation command line during the build process. When using idf.py command (from esp-idf), it is as simple as supplying the -v switch. Some cmake projects require defining the VERBOSE=1 variable. When using OpenWRT build environment, you have to define the V=99 (or V=s) variable when you invoke make... There can be infinite ways to get the desired verbose output and you might have to find the one your build system uses. In the end you have to browse the verbose build output and spot a compiler invocation with all the parameters. Make sure the compiler invocation is to compile a file, and not to link a binary or create a library. In the end you should have something like this (a big chunk of the line has been redacted for clarity):

/home/esp/.espressif/tools/xtensa-esp32-elf/esp-2020r3-8.4.0/xtensa-esp32-elf/bin/xtensa-esp32-elf-gcc -Iconfig -I../components/tarablessd1306 -I/home/esp/dev/esp-idf/components/newlib/platform_include -I/home/esp/dev/esp-idf/components/freertos/include -I/home/esp/dev/esp-idf/components/freertos/xtensa/include -I/home/esp/dev/esp-idf/components/heap/include -I/home/esp/dev/esp-idf/components/log/include -I/home/esp/dev/esp-idf/components/lwip/include/apps [...] -c ../components/tarablessd1306/ifaces/default_if_i2c.c

 Now you have the flags, but... you need them in Python array syntax. No problem, I made this tiny python script to do the conversion:

#!/usr/bin/env python3
import sys;

if __name__ == '__main__':
    for flag in sys.argv[1:]:
        if len(flag):
            print('    \'' + flag + '\',')

Write the script to a file, give it exec permission, and run it passing as arguments the complete line above. It will generate something like this:

    '/home/esp/.espressif/tools/xtensa-esp32-elf/esp-2020r3-8.4.0/xtensa-esp32-elf/bin/xtensa-esp32-elf-gcc',
    '-Iconfig',
    '-I../components/tarablessd1306',
    '-I/home/esp/dev/esp-idf/components/newlib/platform_include',
    '-I/home/esp/dev/esp-idf/components/freertos/include',
    '-I/home/esp/dev/esp-idf/components/freertos/xtensa/include',
    '-I/home/esp/dev/esp-idf/components/heap/include',
    '-I/home/esp/dev/esp-idf/components/log/include',
    '-I/home/esp/dev/esp-idf/components/lwip/include/apps',
    [...]
    '-c',
    '../components/tarablessd1306/ifaces/default_if_i2c.c',

Now remove the first line that corresponds to the gcc binary, and copy all the others to .ycm_extra_conf.py file, inside the flags array.

Flags cleanup


We have copied all the flags, but we have to remove some of them because:
  • Some flags are related to the input and output files, that will be supplied by YCM internals (e.g.: -c <param>, -o <param>).
  • Some flags are GCC specific, but YCM uses clang for code analysis, so unless we remove them, we will get errors (e.g.: -mlongcalls, -fstrict-volatile-bitfields).
  • Some flags are related to debug information or optimizations, and are thus not relevant for code analysis (e.g.: -ffunction-sections, -fdata-sections, -ggdb, -Og, -MD, -MT <param>, -MF <param>)
  • Some flags are architecture specific and are most likely not supported by clang (e.g.: -mfix-esp32-psram-cache-issue, -mfix-esp32-psram-cache-strategy=memw)
  • Some flags might cause sub-optimal error hinting. E.g. remove -Werror for the warnings to be properly highlighted as warnings instead of errors.

Another thing you can do is searching every path that matches the ESP_IDF variable definition, and replace it by this variable plus the remainder of the path. The idea is not having any absolute paths, to be able to adapt this script to other machines. When removing flags, if you have doubts, you can keep the flag, and remove it if YCM complains when you start vim later.

Cross compiler includes

By default, YCM will search your system header files (usually in /usr/include). This can work for many cases (especially if you are developing for a cross Linux platform) but will probably cause problems because your system header files are most likely partially incompatible with the ones from your cross compiler. To fix this problem, you have to tell clang not to use the standard include files, but to use the ones from your cross compiler. For the esp-idf compiler, you can achieve this by adding to the flags array:

    '-nostdinc',
    '-isystem', GCC_PATH + '/lib/gcc/xtensa-esp32-elf/8.4.0/include',
    '-isystem', GCC_PATH + '/lib/gcc/xtensa-esp32-elf/8.4.0/include-fixed',
    '-isystem', GCC_PATH + '/xtensa-esp32-elf/include',
The important detail here is using the -nostdinc flag to avoid the compiler using the system header files. Then supply the platform specific includes.

Additional tweaks

With this we should be ready to test our configuration. Make sure the config file is sitting in your project path and fire vim from there. Open a C/C++ file and YCM should be working, maybe perfectly, but maybe it will still highlight as errors or warnings some lines that are 100% OK. If you followed properly all the steps, and all the paths in the config file are correct, the remaining problems are most likely because we took compilation flags from a file, but there might be other files in the project that are built using different flags. What you will have to do here is browse the reported errors (:YcmDiags is useful here) and fix them by adding to the flags array the needed defines or include directories you lack. Depending on the number of flags you have to add here, this step might get a bit tedious, but each time you add a missing flag, you will be a step nearer to the YCM perfection. To get the esp-idf environment working properly, I had to manually add e.g. the following:

    '-DSSIZE_MAX=2147483647',
    '-I' + DIR_OF_THIS_SCRIPT + '/build/config',
    '-I' + IDF_PATH + '/components/nvs_flash/include',
    '-I' + IDF_PATH + '/components/spi_flash/include',
    '-I' + IDF_PATH + '/components/esp_http_client/include',
    '-I' + IDF_PATH + '/components/nghttp/port/include',
    '-I' + IDF_PATH + '/components/json/cJSON',

And that's all. It can take a while having this perfectly configured, but once done, the productivity enhancement can be very high!

Everything works, yay!

You can find here the complete example .ycm_extra_conf.py file. If you have read through here, I hope you find this guide useful.

Happy hacking!


Sunday, January 31, 2021

Writing a custom trait deriver in Rust

Introduction

Recently I have been experimenting with template metaprogramming in Rust, to write a deserializer for key=value pairs into structs. I usually find Rust documentation awesome, so I was surprised when I was not able to find detailed documentation on this topic. The example in The Rust Programming Language book is very basic and only explains how to start. Then there is The Little Book of Rust Macros that has more info, but again I could not find clear examples on writing a custom deserializer. Searching the net provided some examples, but they were not clear enough for me, and usually used old versions of the proc-macro and quote crates that did not work with recent versions. So I decided to write the deserializer to figure out the puzzle.


The key=value deserializer

I am working on a project that needs to interface wpa_supplicant. There is a wpactrl crate that handles the connection to the daemon and allows making requests and getting the results. But this crate does no parsing of the results output by wpa_supplicant, that are provided in a string with key=value formatting, one pair per line. I could have parsed every line, matching the keys I want to obtain, to assign then the corresponding struct member, but this looked like the perfect opportunity to write an automatic deserializer. So you just write the struct with the fields you want to obtain, tell the compiler to derive the key-value extract code, and profit. Before I start, you can check in GitLab the code I wrote.

So, what I want is to take the following string:
num=42
txt=Hello
choice=OneDoesNotMatch
choice2=Two
And automatically derive the code that parses it and writes the corresponding values to this structure (also containing an enum):
enum TestEnum {
    Def,
    One,
    Two,
}

struct Test {
    num: u32,
    num2: u8,
    txt: String,
    txt2: String,
    choice: TestEnum,
    choice2: TestEnum,
}
The keys available in the string but not available in the struct shall be ignored, and the members of the struct not available in the input string must be filled with default values. Execution of the test program must output this after filling the struct Test:
Test {
    num: 42,
    num2: 0,
    txt: "Hello",
    txt2: "",
    choice: Def,
    choice2: Two,
}

The kv-extract crate 

We already know what we want to achieve, let's get to work! I will not be explaining how to setup the Cargo.toml files, sure you are familiar with them, and the example I linked above from the Rust book explains this perfect, so if you have problems with Cargo, please read the example and check the complete code in my GitLab repository.
 
First we have to create the crate for the key-value deserializer. I have named it kv-extract. This crate just defines the trait with the function to deserialize data, taking the input string and returning the filled structure:
pub trait KvExtract {
    fn kv_extract(input: &str) -> Self;
}
For technical reasons, Rust 2018 requires the code implementing the derive macros to be located at its own crate (this restriction might be lifted in the future), so we have finished with the kv-extract, that was a short crate!

The kv-extract-derive crate

Time to create the kv-extract-derive crate with the derive macro code. The convention is creating derive macros inside the crate we are deriving code for (so we create kv-extract-derive inside the kv-extract crate).

For the derive code, the basic program flow is as follows:
  1. We use proc_macro to assist in the code derivation process when the user writes the #[derive(KvAssign)] sentence over a struct.
  2. Using syn crate, we generate the compiler abstract syntax tree (AST) corresponding to the struct we want to derive the deserializer code for.
  3. We iterate over the AST data to extract the tokens useful for code generation (in this case, the struct name and the struct members.
  4. Finally we use the qoute! macro to generate code tokens that use the data extracted from the AST to build the derived sources.

Extracting the abstract syntax tree

Our entry point in the derive module is defined using the proc_macro_derive macro. The first step is easy, we obtain the AST corresponding to the structure, and pass it down to the function implementing the derive code. The function implementing the derive code will have to return it as a proc_macro::TokenStream representation.
use proc_macro;
use quote::quote;
use syn::{ Data, Field, Fields, punctuated::Punctuated, token::Comma };

const PARSE_ERR_MSG: &str = "#[derive(KvExtract)]: struct parsing failed. Is this a struct?";

#[proc_macro_derive(KvExtract)]
pub fn kv_extract_derive(input: proc_macro::TokenStream) -> proc_macro::TokenStream {
    let ast = syn::parse(input).unwrap();

    impl_kv_extract(&ast)
}
The impl_kv_extract function will have to extract the following data:
  1. The name of the struct we are deriving.
  2. A vector with the data for each structure field.

I found no documentation about the AST and how to traverse it. If you know where to find it, please let me know. Fortunately I was able to figure out the puzzle by printing the AST debug info (this requires using full features on syn crate). First we get a reference to the structure name stored in ast.ident. To reach to the structure fields we have first to destructure ast.data as data_struct. Then destructure data_struct.fields as fields_named, and then we have the fields in fields_named.named, that we asign to fields variable through a reference:

fn impl_kv_extract(ast: &syn::DeriveInput) -> proc_macro::TokenStream {
    let name = &ast.ident;

    let fields = if let Data::Struct(ref data_struct) = ast.data {
        if let Fields::Named(ref fields_named) = data_struct.fields {
            &fields_named.named
        } else {
            panic!(PARSE_ERR_MSG);
        }
    } else {
        panic!(PARSE_ERR_MSG);
    };
    // [...]

Generating code

Now the fun is about to begin, we have to start generating code. The general idea behind code generation in the form of a proc_macro::TokenStream, is to enclose the code snippets we want to build inside a quote! macro. This macro will help us with two tasks:

  1. Convert the enclosed code snippets into a proc_macro2::TokenStream.
  2. Expand tokens (related to the fields we just collected) to build code.

Note that this macro returns proc_macro2::TokenStream type, that is different from proc_macro::TokenStream, but converting from the first one to the later is as simple as invoking the into() method.

We expand the code using two quote! blocks. One of them we will see later, is run once for each struct member to initialize it: each resulting code snippet in the form of a proc_macro2::TokenStream is added to a vector. The result is returned by the kv_tokens() function into the tokens variable. The second quote! block generates the skeleton of the derived code, and expands the tokens variable to complete this skeleton. The resulting derived code is returned as a proc_macro::TokenStream using the into() method:

let tokens = kv_tokens(fields);

    let gen = quote! {
        fn kv_split(text: &str) -> Vec<(String, String)> {
            text.split("\n")
                .map(|line| line.splitn(2, "=").collect::<Vec<_>>())
                .filter(|elem| elem.len() == 2)
                .map(|elem| (elem[0].to_string(), elem[1].replace("\"", "")))
                .collect()
        }

        impl KvExtract for #name {
            fn kv_extract(input: &str) -> #name {
                let kv_in = kv_split(input);
                let mut result = #name::default();

                #(#tokens)*

                result
            }
        }
    };
    gen.into()
}

In the code above, inside the quote! block, we generate the kv_split() function, that returns a vector of tuples in the form of (key, value) pairs, obtained from the input string. Then we generate the implementation of the KvExtract trait for the structure (referenced using #name).

The trait implementation first obtains the key-value pairs from the input string and then creates the result variable with default values (so we will need every member of the struct to implement the Default trait or code will not compile). Then we expand the tokens vector with the code assigning the struct members using the #(#tokens)* syntax, to finally return the result.

The only thing we are still missing is how the tokens vector is generated in the kv_tokens() function:

fn kv_tokens(fields: &Punctuated<Field, Comma>) -> Vec<proc_macro2::TokenStream> {
    let mut tokens = Vec::new();

    for field in fields {
        let member = &field.ident;

        tokens.push(
            quote! {
                kv_in.iter().filter(|(key, _)| key == stringify!(#member))
                    .take(1)
                    .for_each(|(_, value)| {
                        if let Ok(data) = value.parse() {
                            result.#member = data;
                        }
                    });
            });
    }

    tokens
}

The code above, adds a block of code in the form of proc_macro2::TokenStream to the tokens vector for each struct member. This code block takes a specific struct member and iterates the key-value tuples obtained from the input string, to see if any of them matches. When a key matches, its corresponding value is converted using the parse() string method and assigned to the specific struct member that matched. The parse() method requires the FromStr trait to be implemented for the returned datatype, so if we use custom enums or structs as struct members, we will have to implement the trait ourselves (in addition to the Default one as explained earlier). But if we place inside the struct a type already implementing the Default and FromStr traits (for example the MacAddress struct from eui48 crate), it will be beautifully deserialized without us having to write a single new line of code. Nice!

Testing the derive macro

The only thing remaining is to test this works with the following program:

use kv_extract::KvExtract;
use kv_extract_derive::KvExtract;
use std::str::FromStr;

#[derive(Debug)]
enum TestEnum {
    Def,
    One,
    Two,
}

impl Default for TestEnum {
    fn default() -> TestEnum {
        TestEnum::Def
    }
}

impl FromStr for TestEnum {
    type Err = String;
    fn from_str(s: &str) -> Result<Self, Self::Err> {
        match s {
            "Def" => Ok(TestEnum::Def),
            "One" => Ok(TestEnum::One),
            "Two" => Ok(TestEnum::Two),
            unknown => Err(format!("\"{}\" does not match TestEnum", unknown))
        }
    }
}

#[derive(KvExtract, Default, Debug)]
struct Test {
    num: u32,
    num2: u8,
    txt: String,
    txt2: String,
    choice: TestEnum,
    choice2: TestEnum,
}

fn main() {
    let data = "num=42\n\
                txt=Hello\n\
                choice=OneDoesNotMatch\n\
                choice2=Two\n\
                \n";

    println!("{:#?}", Test::kv_extract(data));
}

We had to provide our own implementations of the FromStr and Default traits, but everythings works great, execution outputs the exact same data we expected.

I hope you enjoyed this entry. I had a hard time writing this because I found documentation a bit scarce, but sure derive macros are powerful and beautiful!

Saturday, August 22, 2020

Using Android without Google services in 2020

We all know Android is a mobile operating system used by Google as a data collection platform mainly for ad delivery. It should hardly come as a surprise if I tell you Google is mining every bit of your personal data on any average Android phone. But Android has a very important characteristic making it much more interesting than iOS for privacy minded people: its roots are buried in Open Source grounds.

Android Open Source Project

Android base is known as AOSP (Android Open Source Project). Every Android version is developed by Google, and then sources are released to the world, for any developer to browse and tinker with them. Anyone with the appropriate knowledge can download AOSP sources and (with patience and a powerful computer) build them. Add the corresponding drivers for your phone, and you will have an image you can install and use (assuming your phone has the bootloader unlocked), and that has no Google data collection services inside. There is a very active community around AOSP that will do for you the hard work of collecting the sources and building them, and also will add some more interesting features to the base. These AOSP compilations with added features are called "Android distributions" (or Android distros for short). The most well know one is "Lineage OS", but there are a lot more you can try. You can download ready to install images of these distros for a lot of phones and tablets.

The Google Apps

So far, (almost) everything is fine: you can install on your phone an Open Source OS that is not sucking your data and sending it to Google. But there is a catch: AOSP does not include the "Google Apps" or (GApps). So you will have no Play Store, no YouTube, no Maps, no Gmail, etc. If you are a privacy minded person, maybe you did not want these apps anyway, but there is one thing that is troublesome even if you do not want Google applications: you will lack Google core services, so any application trying to use them (for example any application trying to use Firebase to send a notification to the phone, or trying to use the Maps API to send your location) will lack functionality or completely fail and crash.

Google Apps are closed source. Some people are confused and think GApps are Open Source, maybe because of the OpenGapps project. This project let's you download different GApps bundles, ready to install on your AOSP based device. But you should not be fooled by the name of the project: Google Apps are 100% proprietary and we have no control on what they do. If you install them in your AOSP based device, there will be little difference regarding the data collection performed by Google with respect to the one performed by any Android phone you can buy on the market.

So if you install LineageOS on your phone (without the Google Apps), it will not collect your data and will work mostly as any other Android phone. But a lot of applications will refuse to work, because they will try to use services your phone lacks, or will directly detect you lack the Play Store and will refuse to start.

What can you do if you want a "Google-free" phone, but need some applications that refuse to work without the Google services? Here is where microG project comes to the rescue.

microG


microG is a free (as in freedom) re-implementation of the Google core services and libraries. It implements in a varying degree of completeness services provided by the proprietary Google Apps core, and also spoofs the Play Store so any app that requires it to be installed, can pass this check. For example, using microG, application calls to the Maps API will succeed, but instead of using the Google Maps services under the hood, they will be using Mapbox (an Open Source mapping system). Isn't this cool?

Unfortunately microG is far from perfect. First of all, it is far from completion. Some APIs are completely lacking, and most of them are only partially implemented. You can check here the implementation status. The table looks discouraging, but in my experience, most applications I tried are completely usable.

Another problem when using microG, is that even though the services implementation running on your device is free, the underlying services running on the cloud sometimes are not. If you need the device to log into Google services for using things like the Firebase messaging or SafetyNet, you will need to connect to Google machines. microG will strip identifying data other than the account name, but your device will not be 100% Google free anymore.


Finally, installing microG can be troublesome. It needs to be installed as a system application, and requires that the underlying distro supports "signature spoofing", in order for the microG Play Store application to convince other apps that it is the one coming directly from Google. Out of the box LineageOS builds do not support signature spoofing. There was a heated discussion about this topic, but LineageOS devs decided not to implement it, so something must be done here.

LineageOS for microG

If you want to get rid of Google services in your device, my advice is to install "LineageOS for microG". It is a fork of the official LineageOS distro, but with microG preinstalled (including the signature spoofing support that official LineageOS lacks). As a nice bonus, this distro also includes F-Droid preinstalled, a substitute of the Play Store that has only Free and Open Source Software (FOSS). First you have to check your device is supported. Then for the installation, instructions will vary depending on your device. You will have to check places like XDA-Developers to get them, or even better, find a friend that can do the work for you.

Once you have LineageOS for microG, or any other AOSP based distro with microG on your device, you will have regained total control of it. You can connect to Google servers only if you really need them, and in my experience you will not need to connect at all if you are ready to make some sacrifices. Also no matter what you do, some applications will refuse to work, so you will have to search a substitute (F-Droid is a great tool for this) or just live without them, that is if you are resolved to not use Google services anymore. I use LineageOS for microG on a daily basis, and for me it is pretty usable, I will try documenting some of the things I use and work, and some of the things I lost in this adventure.

What works

Unless otherwise stated, all the applications I will comment here, either come preinstalled or are downloaded directly from F-Droid. If you need downloading an application from the Play Store, there are several methods that work (setting a local repo, using browser plugins, some special apps, etc).

Where's my bloat?


  • "Standard" smartphone tools (calls, SMS clock and alarms, taking photographs, videos, gallery, etc.) work perfect out of the box. You will have some added bonus you will hardly find on any phone you can buy on a shop, such as the ability to record calls.
  • Contacts and Calendar synchronization: I use them with Nextcloud (with DAVx5 app) and they work perfect.
  • e-mail: The included email application works great. In addition to implementing the standard e-mail protocols (SMTP, POP3), it can interact with Exchange (Outlook) and also with Gmail accounts. The only drawback is that if you use second factor authentication, you will need to set up a password for this application. But this is a one-time hassle.
  • Messaging: Telegram works just perfect and does not require connecting to Google services, this is the app I would recommend for messaging. There is an old Telegram version on F-Droid, but if you want a recent one, you will need to get it from the Play Store or elsewhere. Some years ago I used WhatsApp and it also worked, but Firebase/Google Cloud Messaging was needed to get real time notifications. Also WhatsApp is closed source and has ties to Facebook, so if you are still using it, my advice is to uninstall it ASAP. Of course WhatsApp can only be download from the Play Store.
  • Mapping: I use OsmAnd+. It is not as great as Google Maps, but it has many features and is a pretty good substitute.
  • Browsers: Firefox works just perfect. I have not tried Chrome, but I think it also works great. Chrome is not available in F-Droid. Neither is Firefox, but in this case you can download in F-Droid a Firefox updater app that will fetch the most recent version for you.
  • Cloud synchronization (files and others): All the Nextcloud apps I have tried work perfect (Nextcloud, Bookmarks, Notes and Deck).
  • TOTP password generation: andOTP works great and has a lot of options to securely store your OTP configurations.
  • YouTube: I have not tried the official app, maybe it works. But I use NewPipe to watch YouTube videos. It works great most of the time and also has some added features, like downloading videos or reproducing them on a popup window. Make sure you have it up to date, because it sometimes breaks (when Google makes changes to YouTube internals) and developers are quick to fix it.
  • Twitter: I have not tried the official client, I use Twidere app. It is lightweight and full featured, I really like it. The only thing I lack in this app is that it does not yet support Twitter polls. Other than this, it is just superb.
  • Reddit: I use Slide app, and it works great. 
  • Games: All the games I tested downloading them from the Humble Store worked perfect without exception. I have tried at least Monument Valley, Plants vs Zombies, Canabalt HD, Super Hexagon, World of Goo...
  • Emulators: I have only tried RetroArch and it works perfect. Unfortunately it is not available in F-Droid (even though it is Open Source).
  • Multimedia playback: just install VLC. It can play any file you are able to throw it. If you have a media center based on Kodi, both official Kodi app and also Kore app work perfect (I personally prefer the later). I also use TVHGuide to view TDT TV emissions directly streamed from my media center (that has a TDT decoder and Tvheadend software).
  • Spotify: the official Spotify app works perfect. You will not find it in F-Droid, as it is closed source.
  • QR Scan: SecScanQR works perfect and also supports standard linear barcodes.
  • Passbook handling: PassAndroid works perfect.
  • Podcasting: just install AntennaBox.
  • PDF readers: PDF Viewer Plus works great.
  • Dictionary: WordReference (not in F-Droid) works great. I have yet to try some of the Open Source dictionary apps in F-Droid.
  • Rooting: If you need root permissions, Magisk works like a charm. It is not in F-Droid (you have to flash it from the Recovery). Say goodbye to passing SafetyNet checks if you are going to install any root application, including Magisk.
  • Backups: I use TitaniumBackup and it works perfect. Even the license works without having the Google Apps (you have to ask the developer for a license key file). This app is proprietary and as such it is not in F-Droid.
  • Networking: OpenVPN works perfect.
  • Swype type keyboard: AOSP keyboard already supports swype typing style. But unfortunately, for this to work it requires a closed source library (libjni_latinimegoogle.so). You can grab this library from the OpenGapps package and manually flash it for this function to work. Otherwise you will lack this function.

What doesn't work

Here are the things I found not working, and some more comments about things I have not tested but I suspect will not work.

  • BBVA España: this is a spanish banking app. It warns the device OS has been modified and then crashes.

Others I have not tested but I think that have many chances of not working:

  • Other banking apps. I suppose there are many chances for them not to work, or at least to force you to connect to Google (and not have root) to pass SafetyNet checks.
  • Applications requiring DRM media playback (like Netflix). I have not tested but I would be surprised if they work.
  • Android Auto. API has not been implemented, so do not expect it to work.
  • Some games using the Games API (but I had no one to test).

TL;DR

For enhanced privacy, it is possible to use an Android phone lacking Google Services. Install LineageOS for microG (or any other Android distro, and then microG) and most apps should just work. Unfortunately a few of them will fail with this setup, so if you can find alternatives, great. Otherwise, you have to balance what you prefer: the enhanced privacy or the app you cannot use.

Wednesday, May 6, 2020

MegaWiFi, and why you should code for it

It's been a long time since I wrote here about MegaWiFi. To date, there are still no games released using it, so you might think this project is long dead, do you?

Well, if you do, you are wrong! Progress has been slow (my spare time is limited), but lot of things have happened:

  • MegaWiFi API has greatly matured (currently it is version 1.3), and I spent a lot of time working on making it easy to use. I have created an implementation of pseudo threads and timers, allowing to use the APIs in both synchronous and asynchronous flavors. It has support for TCP, UDP, SNTP, HTTP/HTTPS, etc.
  • I also spent a lot of time working on API documentation. All API functions are pretty well documented, and I have provided properly explained examples for most common use cases.
  • There was an initial effort long time ago to add MegaWiFi support to the great Blastem! emulator. Unfortunately this was halted prior completion. But recently I have resumed work on this, and now MegaWiFi support in Blastem! is very usable.
  • There is a game finished and ready for release (WorldCup 1985 by Pocket Lucho) with MegaWiFi support! It should be released soon by 1985alternativo. Go to my previous post to reach the repos
 
Megadrive/PC cross play, what a time to be alive!
  • There is at least another game with MegaWiFi support in early development, again by Pocket Lucho.
  • I added support to use MegaWiFi with the popular SGDK development kit, with detailed instructions and a precompiled toolchain for Windows, ready to use.
  • I wrote a Gaming Channel implementation, allowing devs to publish games online, and users downloading them directly to the cart. This shows the platform is rock-solid stable, allowing to flawlessly download and play games.
 
Steam is something from the past!

  • And there are many many more features I will not bring here now, to avoid making this post too long.
So, to sum it all, if you like coding for these vintage devices, you should consider starting coding a WiFi enabled Megadrive game NOW! The reasons?:
  1. Hardware and Firmware are mature.
  2. API is mature, well documented and easy to use.
  3. You can code your way or use SGDK for an easy kickstart.
  4. There are great development tools readily available, and emulator support, including integrated debugger with breakpoints, variables watch, etc. Yes, Blastem! is great!
  5. You should be able to publish the games in physical cartridge format, make them available as digital downloads directly to the Megadrive, or play them via emulator.
  6. Everything is Open Source Software and Hardware: the cart and programmer schematics, the firmware for the WiFi module and programmer, the API for Megadrive, the PC tool for programming, the WiFi bootloader...). Go to my previous post to reach the repos.
  7. Megadrive is cool, and WiFi on the Megadrive is even cooler!